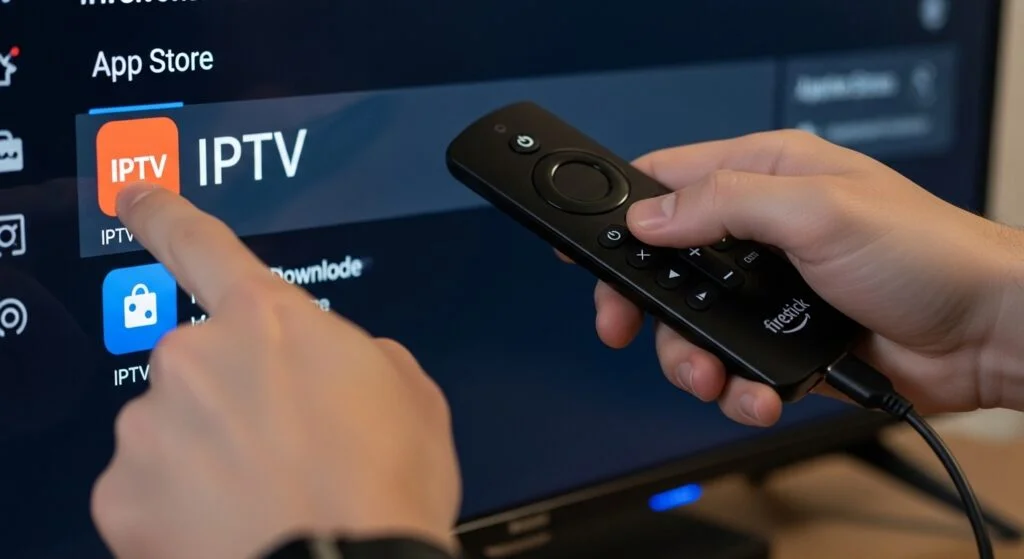
Amazon Firestick remains the most popular starting point for South African households setting up IPTV for the first time, and this iptv setup guide firestick owners can follow covers every step from unboxing to your first working live stream, including the specific settings and troubleshooting relevant to South African conditions.
1. Before You Start: What You'll Need
You'll need a Firestick (any current generation works well, though 4K models offer better performance), a stable internet connection ideally connected via ethernet or strong WiFi, an active IPTV subscription with your provider's login credentials ready, and roughly twenty minutes for the complete setup process covered throughout this guide.
2. Step 1: Initial Firestick Setup
If you haven't already, connect your Firestick to your TV's HDMI port, power it on, and complete Amazon's initial setup wizard — connecting to your WiFi network and signing into (or creating) an Amazon account. This initial setup is required even if you plan to primarily use the device for IPTV rather than Amazon's own content.
3. Step 2: Enabling Apps From Unknown Sources
Navigate to Settings > My Fire TV > Developer Options. If Developer Options isn't visible, go to Settings > My Fire TV > About, and click on your Firestick's name seven times to unlock Developer Options. Within Developer Options, enable "Apps from Unknown Sources."
4. Step 3: Installing the Downloader App
Return to your Firestick's home screen, search for "Downloader" in the search bar, and install this free app from the Amazon Appstore. Downloader is the standard, officially available tool for sideloading apps not directly listed in Amazon's own store, covered in more depth throughout our APK safety guide.
5. Step 4: Downloading Your Chosen IPTV Player
Decide which player app suits your household, using our complete player comparison guide if you're unsure — IPTV Smarters Pro is our default recommendation for most first-time users. Open Downloader, enter your chosen app's official download URL, and begin the download.
6. Step 5: Installing Your IPTV Player
Once downloaded, Downloader will prompt you to install — follow the on-screen steps, and when complete, choose to delete the downloaded file to free up your Firestick's storage, a step Downloader typically offers automatically.
7. Step 6: Entering Your Provider Credentials
Open your newly installed IPTV player and select your connection method based on your provider's issued credentials — Xtream Codes API (server URL, username, password) or M3U playlist URL. Enter these carefully, checking for accidentally copied extra spaces, a common cause of failed logins.
8. Step 7: Testing Your Setup Properly
Once logged in, allow a few minutes for your channel list and EPG to fully populate, then test a live channel. Following the trial-testing principles covered throughout our broader testing guide, test specifically during a peak-hour period and, if possible, during a live sporting fixture before considering your setup fully verified.
9. Optimising Your Setup for South African Conditions
Within your player app's settings, consider increasing the buffer size slightly for improved stability during South African peak-hour viewing, and pair your Firestick setup with a properly sized UPS protecting your router and Firestick for load shedding resilience, covered in more depth throughout our broader infrastructure content.
10. Common Setup Problems and Fixes
Downloader can't find the URL: Double-check for typos, and confirm you're using the exact URL provided by your chosen app's official source.
App installs but won't open: Restart your Firestick and try again — this resolves most first-time installation glitches.
Login fails despite correct credentials: Re-type credentials manually rather than relying on autocomplete, which can introduce unwanted characters.
Buffering during peak hours: This points to your provider's infrastructure rather than your Firestick setup — see our best IPTV South Africa testing for reliability guidance.
11. Frequently Asked Questions
Do I need to sideload an app, or are IPTV players in the Amazon Appstore? Some, like IPTV Smarters Pro, are directly available; others require sideloading via Downloader, covered throughout this guide.
Is sideloading on Firestick safe? Yes, provided you download from a verified, official source — the risk lies in the source, not the sideloading process itself.
How long does the full setup take? Typically fifteen to twenty minutes for a first-time setup, following the steps covered throughout this guide.
Can I use more than one IPTV player on the same Firestick? Yes — installing multiple apps for comparison is a great way to find your preferred interface, covered in our player comparison guide.
What if my Firestick feels slow running IPTV apps? Consider a lighter-weight app like Dev IPTV Pro, or check whether your specific Firestick generation meets reasonable performance expectations for your chosen app.
Stuck at any step of this setup? Reach out to our team and we'll help you get it working.
Suggested image: Step-by-step screenshot sequence of the Firestick IPTV setup process, alt text: "iptv setup guide firestick south africa"
Suggested external dofollow links: Amazon official Firestick support page, official Downloader app page
Internal sibling links: Article #7 (IPTV Box vs Smart TV vs Firestick), Article #15 (IPTV Smarters Pro), Article #22 (How to Choose the Right IPTV Player)
12. Why Firestick Remains the Recommended Starting Point
Before diving into deeper setup detail, it's worth explaining why this iptv setup guide firestick specifically focuses on, rather than Android boxes or Smart TV apps, as covered in more comparative depth throughout our device comparison guide. Firestick offers the strongest combination of affordability, broad app compatibility, and straightforward setup among the devices commonly used for South African IPTV — official Amazon support, regular software updates, and a large enough user base that troubleshooting resources are widely available online whenever a specific issue arises. For households setting up IPTV for the very first time, without strong existing preferences toward a different platform, Firestick remains our default, safe recommendation precisely because of this combination of accessibility and reliability.
13. Choosing the Right Firestick Generation
If you haven't yet purchased your Firestick, it's worth understanding the practical differences between generations before buying. The standard Fire TV Stick handles standard and HD IPTV content comfortably for most households. The Fire TV Stick 4K and 4K Max offer meaningfully more processing power, translating into smoother EPG navigation and reduced buffering risk during higher-bitrate content specifically — worth the modest additional cost if your budget allows, particularly for households planning to watch a lot of live sport, where responsive channel switching and stable playback during peak-hour demand matter most, as covered throughout our IPTV sports guide.
14. A More Detailed Walkthrough of the Downloader App
Given how central Downloader is to this entire sideloading process, it's worth a more detailed walkthrough of using it correctly and safely, building on the safety principles covered throughout our dedicated APK safety guide. Once installed, Downloader presents a simple URL entry field — this is where source verification matters most throughout this entire setup process. Only enter URLs from your chosen app's official developer website or a well-established, verified source; avoid URLs from unfamiliar forum posts or file-sharing sites. Downloader will show a download progress bar, followed by an installation prompt once complete — this entire process typically takes under two minutes for a standard IPTV player app.
15. Understanding Firestick Storage Considerations
Firestick models, particularly older or base-tier generations, have genuinely limited internal storage compared to a full Android device, worth understanding as you build out your IPTV setup. Each app you install, particularly if you're testing multiple player apps following the comparison approach covered in our player selection guide, consumes storage space that can add up meaningfully on a storage-constrained device. Periodically reviewing and uninstalling apps you're no longer using, through Settings > Applications > Manage Installed Applications, is a worthwhile habit specifically for Firestick users, more so than for devices with more generous storage allowances.
16. Setting Up a Remote-Friendly Navigation Experience
Once your IPTV player is installed and connected to your provider, it's worth spending a few extra minutes organising your setup for genuinely comfortable day-to-day Firestick remote navigation, rather than leaving everything at default configuration. Most player apps let you reorder or favourite specific channels, moving your household's most-watched content to the top of your list rather than requiring a scroll through an entire, potentially large provider channel list every time you want to switch. This small organisational step, taking perhaps five minutes, meaningfully improves daily usability specifically for Firestick's remote-based navigation, where scrolling through a long list is naturally slower than the touch-based scrolling available on a phone or tablet.
17. Firestick-Specific Buffer and Quality Settings
Building on the general South African peak-hour optimisation covered throughout our broader player app content, it's worth being specific about how to access these settings on Firestick particularly. Within your installed IPTV player's own settings menu — not Firestick's general device settings — look for playback, buffer, or quality-related options, typically found under a "Player" or "Settings" section within the app itself. Increasing buffer size slightly here, at the cost of a marginally longer channel-load time, is one of the most effective South African-specific optimisations available, given how directly it affects your stream's resilience to brief network fluctuations during peak-hour demand.
18. Testing Your Firestick Setup Through a Load Shedding Cycle
If your household experiences scheduled load shedding, it's genuinely worth testing your new Firestick IPTV setup specifically through a power interruption before considering your setup fully verified, consistent with the trial-testing methodology covered throughout our broader guides. Note whether your Firestick and your chosen player app resume playback automatically once power returns, or whether manual intervention — reopening the app, re-selecting a channel — is required each time. This single test tells you more about your setup's genuine day-to-day reliability, specifically for South African conditions, than almost any other verification step, and it's one that international Firestick setup guides simply never think to include.
19. Connecting a Firestick to an Older Television
If you're pairing your Firestick with an older television lacking a dedicated HDMI-CEC remote integration, or with limited HDMI ports, it's worth a brief practical note. Most Firesticks include an HDMI extender cable in the box, useful if your TV's HDMI ports are positioned awkwardly or recessed in a way that makes a directly-plugged Firestick sit uncomfortably close to the panel. If your older television has limited available HDMI ports already occupied by other devices, an HDMI switch (a small, inexpensive accessory) lets you connect multiple devices to a single port, switching between them as needed — worth considering if HDMI port availability is a genuine constraint in your specific setup.
20. A Realistic First-Time Setup Timeline
Bringing together every step covered throughout this guide, here's a realistic timeline for a first-time Firestick IPTV setup: initial Firestick and WiFi setup, roughly five minutes if starting completely from scratch; enabling Developer Options and installing Downloader, roughly three minutes; downloading and installing your chosen IPTV player, roughly three to five minutes; entering provider credentials and allowing initial synchronisation, roughly five minutes; and testing thoroughly across at least one peak-hour session, which doesn't need to happen immediately but is worth planning for within your first day of use. Total hands-on setup time: roughly fifteen to twenty minutes, consistent with the estimate given at the start of this guide, making this a genuinely achievable single-sitting task for most South African households.
21. A Quick Reference Setup Checklist
| Step | Task | Estimated time |
|---|---|---|
| 1 | Initial Firestick and WiFi setup | 5 minutes |
| 2 | Enable Developer Options and Unknown Sources | 2 minutes |
| 3 | Install Downloader app | 1 minute |
| 4 | Download chosen IPTV player via Downloader | 2 minutes |
| 5 | Install IPTV player | 2 minutes |
| 6 | Enter provider credentials | 3 minutes |
| 7 | Test playback and organise channels | 5 minutes |
22. Troubleshooting Beyond the Basics
Beyond the common problems covered earlier, a few less obvious Firestick-specific issues are worth addressing. If your Firestick feels sluggish generally, not just within your IPTV app specifically, check Settings > My Fire TV > About for available system software updates, since Amazon periodically releases updates improving overall device performance. If your remote becomes unresponsive intermittently, this is sometimes resolved by re-pairing it through Settings > Controllers & Bluetooth Devices, rather than indicating any deeper IPTV-specific problem. And if you notice your Firestick's storage filling up unexpectedly quickly, check for cached data accumulation within your IPTV player's own app settings — some apps cache EPG and channel data locally, which can be cleared periodically without affecting your login or channel configuration.
23. Setting Up a Second Firestick for Another Room
If your household is expanding IPTV to a second room, the setup process covered throughout this guide repeats identically on your second Firestick — the same app installation, the same provider credentials (provided your subscription's concurrent-stream allowance supports simultaneous use across both rooms, as covered throughout our broader provider vetting content). It's worth confirming this concurrent-stream allowance specifically before assuming a second Firestick will work smoothly alongside your first, since some providers cap simultaneous streams more restrictively than their marketing materials suggest.
24. Keeping Your Setup Updated Over Time
Once your initial setup is complete, a small amount of ongoing maintenance keeps everything running smoothly. Periodically check for Firestick system updates through Settings > My Fire TV > About. For your sideloaded IPTV player specifically, since it won't auto-update the way an official Appstore app would, periodically revisit your original download source to check for a newer version, following the same safe sideloading process covered throughout our APK safety guide. This ongoing attention, taking perhaps five minutes every month or two, keeps your setup running at its best rather than gradually falling behind on updates that might otherwise improve stability or add useful features.
25. Final Thoughts
This iptv setup guide firestick owners can follow from start to finish covers everything needed for a genuinely smooth first-time setup — from initial device configuration through safe app sideloading, provider connection, and South African-specific optimisation for peak-hour conditions and load shedding resilience. Follow the steps in order, don't rush the source verification step when sideloading your chosen app, and test thoroughly during genuine peak-hour conditions before considering your setup fully verified. Pair your properly configured Firestick with a well-vetted provider, following the framework covered throughout our complete IPTV South Africa guide, and you'll have a dependable, well-optimised South African IPTV setup ready for months of reliable viewing ahead.
If you get stuck at any specific step, our team is genuinely happy to help you troubleshoot directly — reach out through our contact page with details of exactly where you're stuck.